Worktop
I would have liked to have milled wood on a traditional workbench but shortage of space in my shop led to a more rational worktop and besides, the combination machine enabled for more accurate outcome than I could never have reached by hand. So here is my worktop.
The only flat reference surface is the table of the combination machine and the hold-downs locked in the sliding table groove have the capacity of keeping a wide range of workpiece dimensions at a standstill. The worktop under the window at the back of the shop substitutes for a workbench for most of the common activity and some drilled holes accommodate a holdfast. As for working on the edges, the leg vice allows for clamping long boards along the flush face of the main bottom cabinet. Lastly the retractable table is occasionally lowered when I need more natural light.

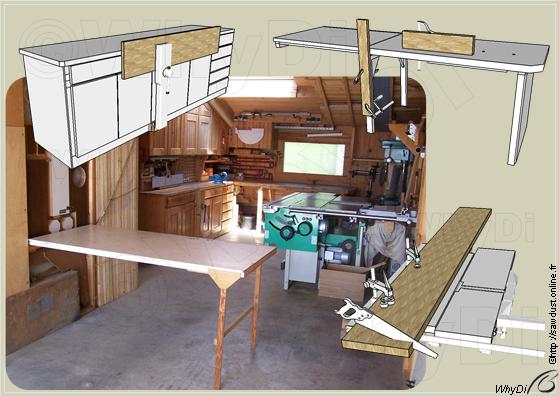
The whole worktop height stands about 5 cm (2") under the machine table top and is often used as a support for the rear table extension as well as the arm stand and so forth but as I am growing in age I have felt the need to rise the main top in order to preserve my back. In that perspective I designed a two-height top (1) where the two folding spacers stay under the table when not used. Shifting the height implies the following process and I start gliding the heavy top along the right leg until its edge contacts the ground (2) then rise and unfold the rear spacer before the front one (3).

Perhaps I could have devised a toolfree lock but I typically move from one position to another once in a way and four wood screws with the help of a cordless drill secure the first element against the second one and conversely (4). Both stand into matching recesses in the below body that prevent from going away. Finally the top goes back onto the spacers(5) and tools keep within arm reach whatever the heigh position.
